How To Attach A Roof To A Wall Height Revit

Solved Adjusting Assembly Wall Layers Autodesk Community Revit Products
Revit House 05 Changing Wall Height Youtube

Creating Roof For Multiple Wall Heights And Overlapping Roof Sections Autodesk Community Revit Products

Revit Tutorials Roofs Youtube

Wall Heights Will Not Change Autodesk Community Revit Products

Solved Roof Wall Join One Side Roof Misses Autodesk Community Revit Products

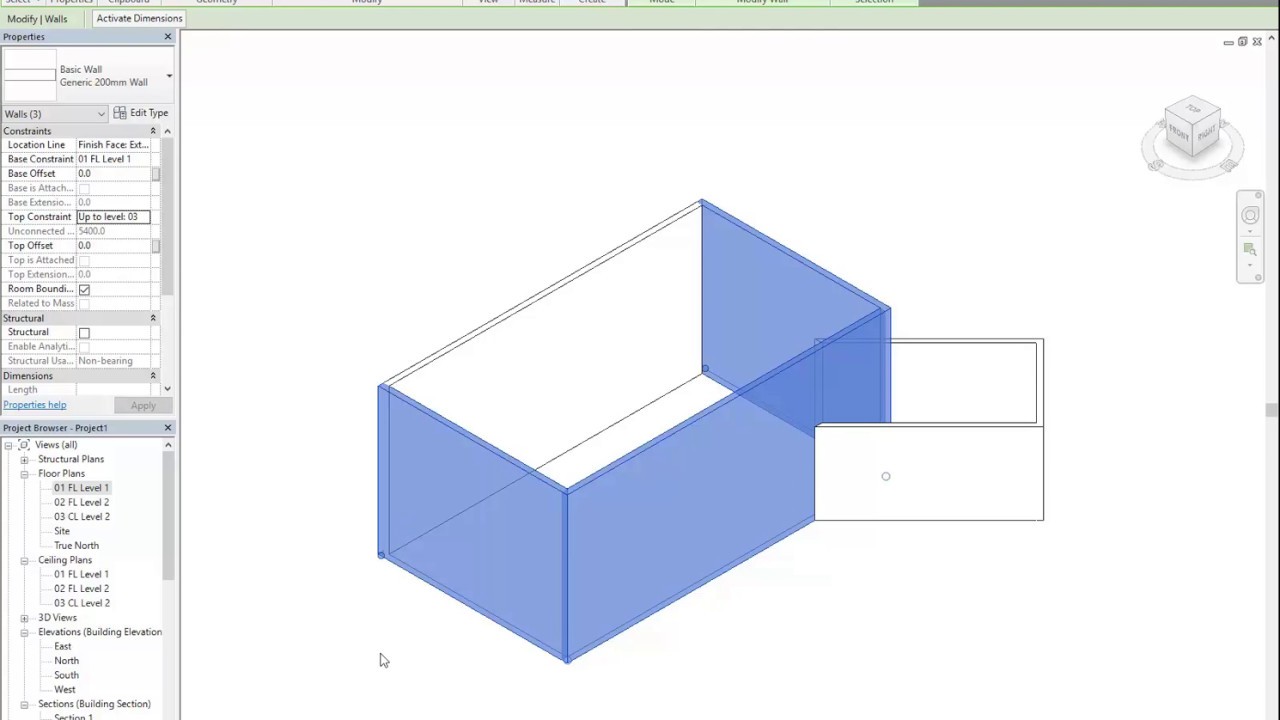
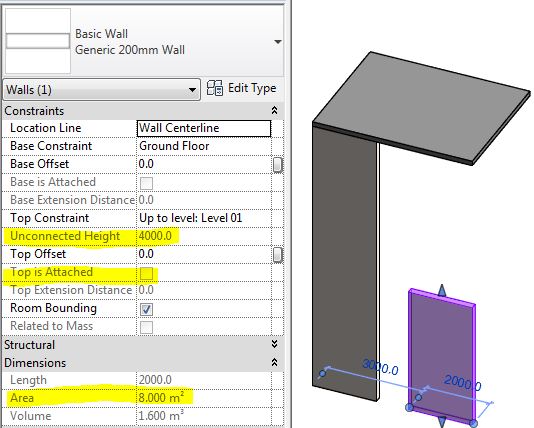
The other element can be a floor a roof a ceiling a reference plane or another wall that is directly above or below.
How to attach a roof to a wall height revit. This happens to your wall it forms into the shape of the roof to cover the gap. In this video we will be adding a structural truss underneath a roof and then attach the truss to the roof. By attaching a wall to another element you avoid the need to manually edit the wall profile when the design changes. The other element can be a floor a roof a ceiling a reference plane or another wall that is directly above or below.
Revit tutorial showing modelling of basic house project. When i make the roof i can only set the constraint to one wall height only. In this video i show you how to attach the walls in revit to the roof above them. Select the attach top base tool and then click the roof to attach the wall to the roof.
After placing a wall you can override its initial top and base constraints by attaching its top or base to another element in the same vertical plane. In this video i show you how to attach the walls in revit to the roof above them. Do the same for any leftover sides. You will get all the answer in this short and efficient video.
May 10th 2011 05 19. Check out the complete blog post. By attaching a wall to another element you avoid the need to manually edit the wall profile when the design changes. So its either floating above some walls or going through some walls.
After placing a wall you can override its initial top and base constraints by attaching its top or base to another element in the same vertical plane. Create the roof at whatever elevation you want then select all the exterior walls and attach them to the roof.

Unconnected Wall Height Parameter Vs Actual Wall Height Autodesk Community Revit Products

Revit Architecture Roof By Footprint Bimscape

Solved Autodesk Revit 2020 Constraints Properties Issue On Wall And Level Autodesk Community Revit Products

Attach Walls To Other Elements Revit Lt Autodesk Knowledge Network

Solved How To Maintain Wall Height When Using Roof By Footprint And Extending Roof Autodesk Community Revit Products

Revit Architecture How To Add Curtain Walls Lynda Com Tutorial Youtube
Revitcat 2017

Solved Revit 2016 Beginner Roof Problems Autodesk Community Revit Products

Autodesk Revit Sloping Curved Walls Youtube

Https Encrypted Tbn0 Gstatic Com Images Q Tbn 3aand9gctkcgivwdq6gfpjfbodadzths Kaff55fchna Usqp Cau
Https Portal Imaginit Com Portals 0 Whitepapers Imaginit New Wp Revitroofs Pdf

Parametric Shadowbox Panels Ceiling Plan Paneling Shadow Box

Revit Tutorial Working With Multiple Levels Lynda Com Youtube

Levels Revit Products 2016 Autodesk Knowledge Network

How To Obtain And Import A Gbxml File From Autodesk Revit To Hourly Analysis Program Bim4tips
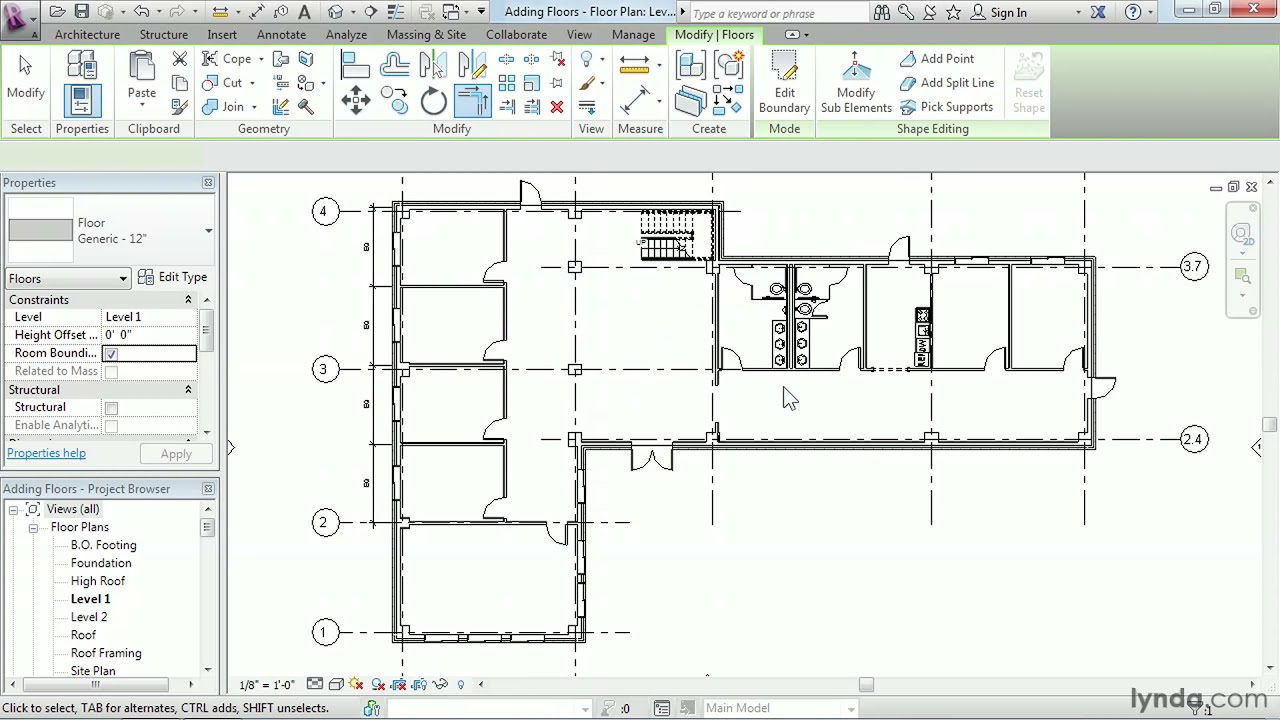
Revit Architecture How To Work With Floors Lynda Com Tutorial Youtube

Revit Architecture An Introduction To Revit Walls Bimscape

Generate Color Legend For Ceiling Heights Revit Dynamo Ceiling Plan Generation Parametric Architecture
Https Encrypted Tbn0 Gstatic Com Images Q Tbn 3aand9gcqt Jag1pa Hofhz 59fqg8i0feamtfelr0xlmsrdq6chiqvxbg Usqp Cau

Trapezoidal Wall Cladding Wall Cladding Cladding Revit Architecture

Solved Revit 2018 Wall Top Constraint Issues Autodesk Community Revit Products

Revit Architecture Tutorial Working With Dwg Files Lynda Com Youtube

Common Types Of Roofs How To Model Them In Autodesk Revit Agacad
Constraints Revit Products 2016 Autodesk Knowledge Network

Solved Sloped Ceiling Following Pitch Of Stairs Autodesk Community Revit Products

Revit Structure Best Practices Modelical

76 Autodesk Revit Tips And Shortcuts By Viatechnik Autodesk Revit Revit Tutorial Building Information Modeling
Levels Essential Skill Revit Products 2020 Autodesk Knowledge Network

Solved Different Wall Heights And Wall Problem Autodesk Community Revit Products

Revit Conceputal Massing 04 Wall Roof By Face Revit Tutorial Autodesk Revit Mass

Facades Modelling Operation In Revit Modelical

How To Use Your Own Sections In The Revit Wood Framing

Modify The Vertical Structure Of Walls Youtube

Change The Room Height Graphically Revit Products 2016 Autodesk Knowledge Network

Storefront Curtain Wall Part 3 Modifying The Height Width Dimensions Youtube
Solved Levels Not Showing In Elevation Autodesk Community Revit Products

Create Roof Trusses With Purlins In Revit Roof Trusses Roof Truss Design Roof
Wall Structure Diferent Height Per Material

Pin By Mickoloy Wellington On Architectural Detail Roof Structure Architecture Details Parapet
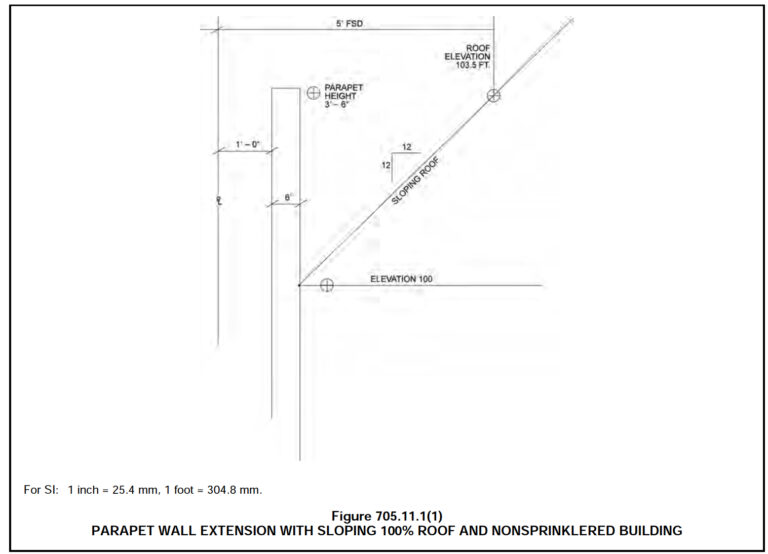
When Does The Code Require Parapets What Construction And Fire Resistance Requirements Exist For Parapets Woodworks

Engineer Civil Revit Residentialdesign Jeffery J Jensen Wiki

Rhino Inside Revit

