How To Add Overhang After Roof Revit

Revitcity Com Roof Overhang Extension

Roof Overhang Problem Autodesk Community Revit Products

Revit Roof Tip 5 Activate Overhang On Picked Walls Roof Youtube

Solved Roof Level Overhang Autodesk Community Revit Products

Solved Roof Overhang Option Not Available For Some Roofs Autodesk Community Revit Products

Creating An Overhang Youtube

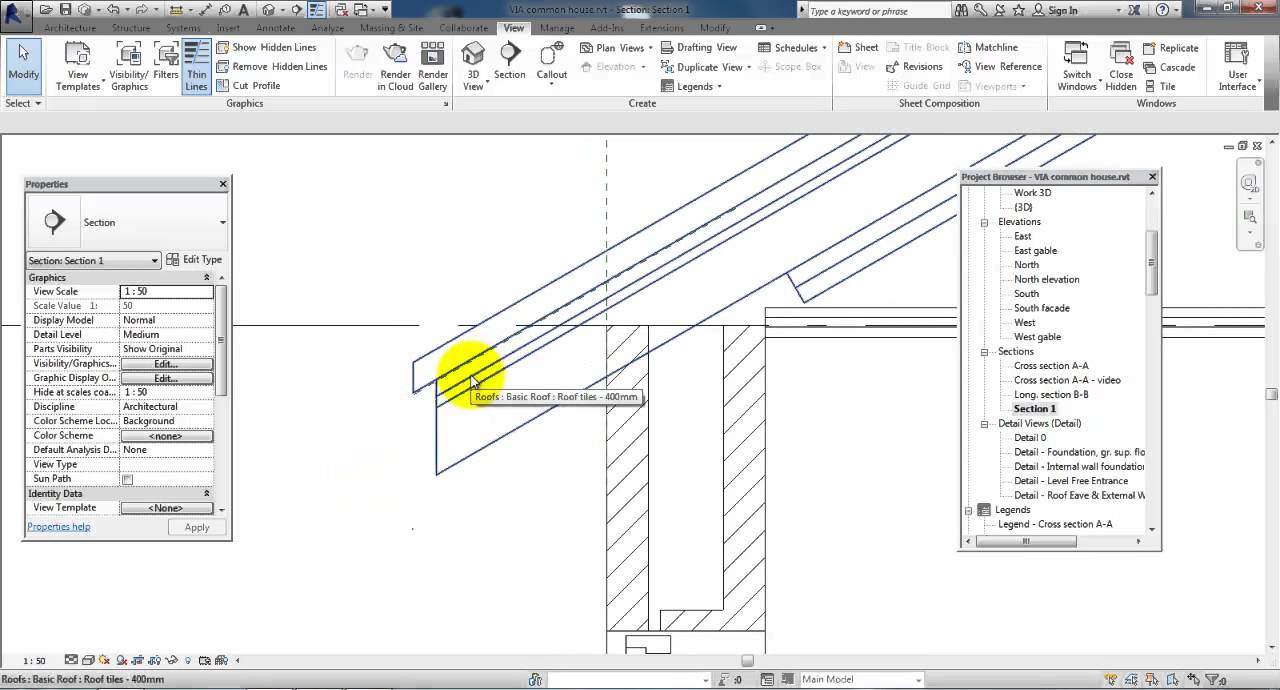
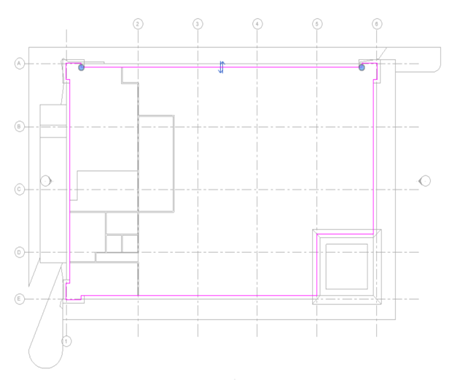
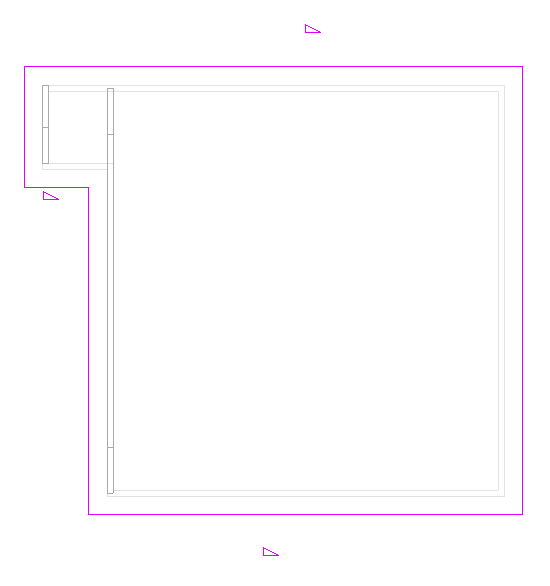
3d view of roof begin by opening the plan view in which you want to see the roof line overhang as a hidden line.
How to add overhang after roof revit. Activate overhang on picked walls roof this is part of the revit pure basics package. Extend into wall to core. Two options for the overhang. In the properties dialog box for the view you want to see the overhang lines in set the underlay drop down to be the level on which the roof was created.
Understand your roof options. 1 st floor no overhang. If you choose not to move the roof to a different level revit notifies you later if the roof. Click architecture tabbuild panelroof drop down roof by footprint.
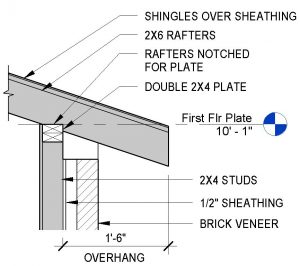
This post explores the effect of different types of wall finish materials on the overhang of the roof. Display a floor plan view or a reflected ceiling plan view. Creates a roof using the building footprint to define its boundaries. On the options bar for overhang enter 600 and select defines slope.
Click architecture tab roof drop down roof by footprint. Check out the full thing. This video will show you how to increase the overhang on a portion of the roof and fix the eave height. After creating a roof you can change its shape or overhang cut openings or align ridges.
If you try to add a roof on the lowest level a dialog prompts you to move it to a higher level. Learn how to troubleshoot your roof overhang or offset issues to make better more precise roofs with autodesk revit. Open the 02 lower parapet floor plan. If you want to change the position of the roof use the properties palette to edit the base level and offset properties to change the position.
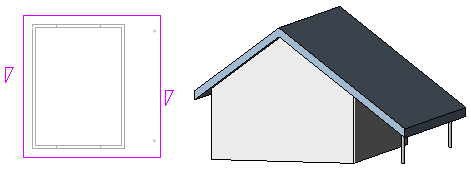
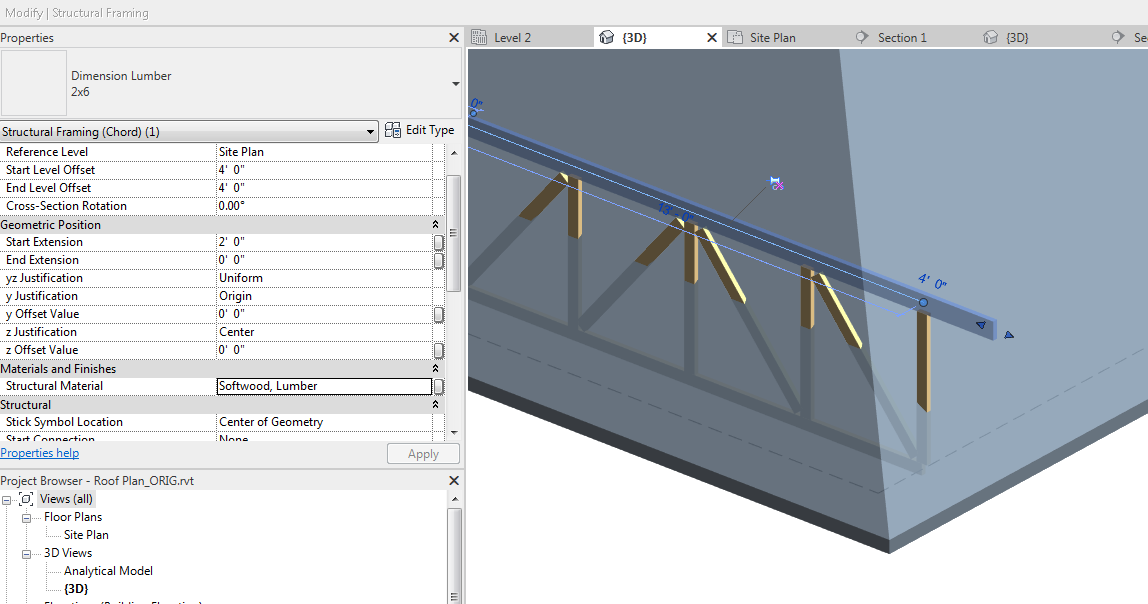
In this video we will be adding a structural truss underneath a roof and then attach the truss to the roof. Create a sloped roof with an overhang. On the draw panel click pick walls.

Solved Roof Overhang Overlap Single Sketch Autodesk Community

Revit Roof Edits Increasing The Overhang Youtube
Eaves Revit Products 2019 Autodesk Knowledge Network
Revit 2014 Roof Eaves And External Wall Youtube
Overhangs And Wall Thicknesses In Revit Best Cad Tips

Roof Overhang Autodesk Community Revit Products

Prefab Roof Truss Overhang Issue Autodesk Community Revit Products
Modify A Roof Revit Products 2020 Autodesk Knowledge Network
How To Attach A Howe Truss With Overhang To A Roof In Revit Revit Products 2018 Autodesk Knowledge Network

Solved Roof Not Overhanging Properly Autodesk Community Revit Products

Create A Roof By Footprint Revit Products 2016 Autodesk Knowledge Network

Roof Overhang Edges Must Project Hidden Lines When Are Whitin View S Top Range Autodesk Community

Adding Roof Edge Dormers Revit Tutorial Lynda Com Youtube
How To Show A Roof Overhang In A Plan View With Revit Imaginit Building Solutions Blog

Revit Roof Basics 04 Intersect By Roof Join Cadclips Youtube

Trim Interscting Roofs Autodesk Community Revit Products

Detailing Rake Ends

Revitcity Com Roof Sheeting Overhang
Https Encrypted Tbn0 Gstatic Com Images Q Tbn 3aand9gctdpd70owfkuahmj4cfljo6uzvyzcxflg5bevhh056uu5nw5i D Usqp Cau

Creating Mansard Roof In Revit Youtube
Https Portal Imaginit Com Portals 0 Whitepapers Imaginit New Wp Revitroofs Pdf
Video Create A Dormer Revit Products 2019 Autodesk Knowledge Network

How To Troubleshoot Roof Overhang And Offset Issues In Autodesk Revit Youtube

Revit Roof Tutorial Revit Curved Roof Youtube

Modelling Butterfly Roof In Revit Youtube

Solved Removing Roof Eves Autodesk Community Revit Products

Https Encrypted Tbn0 Gstatic Com Images Q Tbn 3aand9gcr9mdyox86unm Ekfatqenr Dn1hpujukervg Usqp Cau

Revit Roof Tip 1 Remove Slope To Create Flat Roof Youtube

The Bim Jedi Formally The Revit Jedi Box Cornice With Overhang Rake Aka Pork Chop Roof

False Rafter Tails Give The Impression Of A Timber Framed Roof Structure First The Tails Were Attached To The Frieze Board Then Roof Detail Metal Roof Roof

Roofs Revit Products 2019 Autodesk Knowledge Network

Revit Architecture 8020 Bim
Video Create A Roof Revit Products 2021 Autodesk Knowledge Network
Part 5 Create A Roof Revit Products 2021 Autodesk Knowledge Network

Wood Framing Metal Framing In Revit The Most Significant Enhancements Of The Year Feb 2019 Feb 2020 Agacad

Soffits Revit Products 2019 Autodesk Knowledge Network

Creating A 2d Line Based Detail Component Family Search Autodesk Knowledge Network

Revit Adjusting The Top Chord Of A Truss For An Overhang Youtube

Solved Roof Is Drawn Higher Than Level Placed At Autodesk Community Revit Products

Modify A Roof Revit Lt 2017 Autodesk Knowledge Network

Revit Tutorial Creating A Jerkinhead Half Hipped Roof Therevitkid Com Tutorials Tips Products And Information O Hip Roof Revit Tutorial Roof Styles
Continuous Overhanging Gable Roof Bd Mackey Consulting The Revit Geek Blog

