How For Put Nail On The Felt In Roll Roofing

Emergency Roofing Repair Roof Repair Diy Roof Patch Diy Home Repair

Diy How To Roof A House Section 3 Of 6 Installing Felt Paper Roof Installation Roofing House Exterior

Sheathing The Roof Plywood Sheathing Underlayment And Shingles Ice And Water Shield Will Protect The Roof Agains Roofing Roof Installation Building A Porch

Easy Guide To Roofing Roofeditmyself Ad Installing Roof Shingles Roof Shingles Installing Shingles

General Roofing Grs On Twitter Roof Maintenance Roofing Maintenance Checklist

How To Build A Lean To Shed Complete Step By Step Guide Lean To Shed Building A Shed Lean To
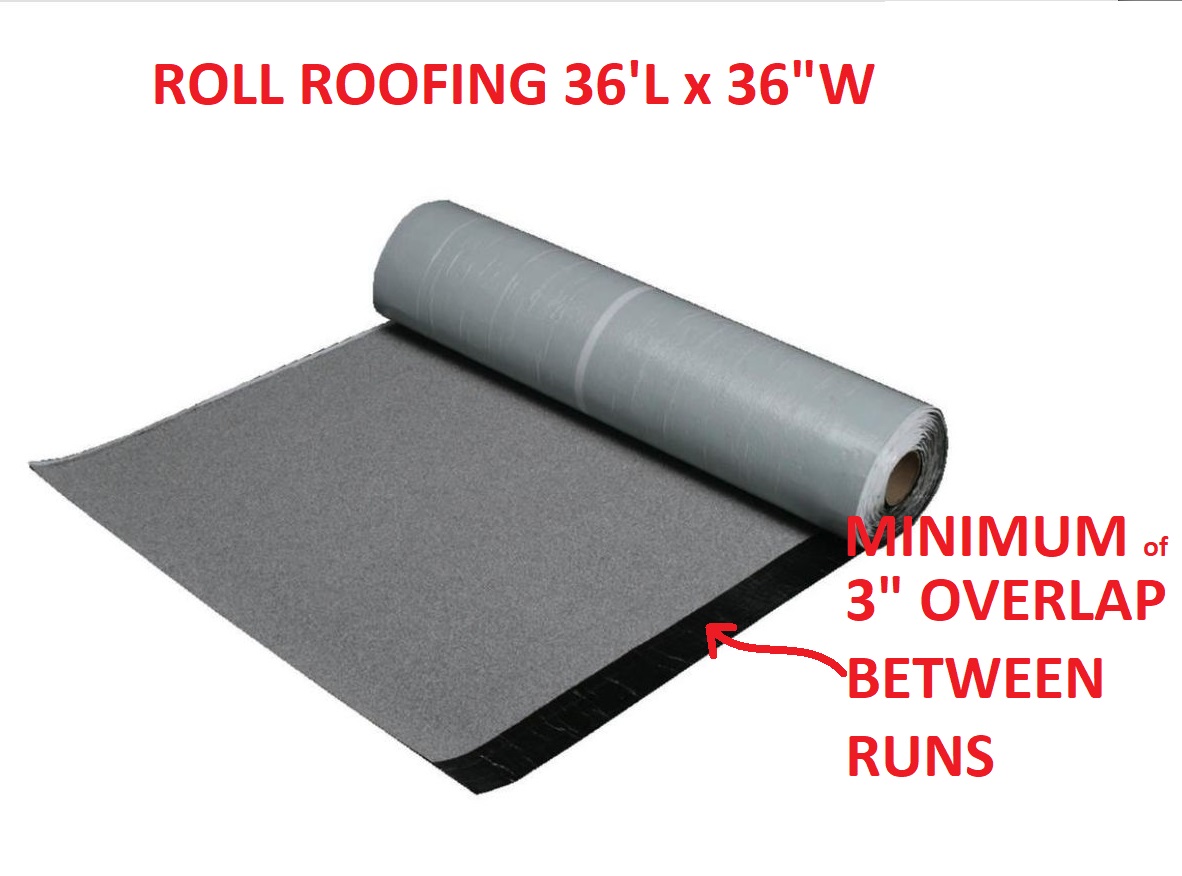
Nail the roofing in place with short roofing nails spaced 6 inches apart and 1 inch in from the outer edges of the roll roofing.
How for put nail on the felt in roll roofing. Planning and executing a good roofing job requires knowledge of every aspect of the job. Use a construction stapler or a hammer. Put fasteners at least every 8 inches. However there are other advantages to roll roofing including that it can last up to 12 years.
Applying roofing felt first will better protect the sheathing against condensation as well as against leaking. Add a second piece of full width roll roofing over the first. Nail down the 18 inch roll roofing sheet that it is covering the valley. Apply rolled roofing rolled roofing has become more and more popular in recent years.
Roll out about 10 feet of felt and fasten with staples or roofing nails with plastic washer heads. Use 1 inch nails for new roofing. If the roof is sloped you can use the exposed nail method. Roll roofing is often installed over bare wood sheathing or sheathing that has been painted with a primer.
Roll roofing is by far the easiest type of roofing to install. The nails should start 3. When compared to shingles rolled roofing is far cheaper and much easie. They are long enough to penetrate the sheathing.
Sometimes called roofing felt underlayment roofing tar paper or roll roofing this is a layer of protection installed between the roof deck and the roofing shingles. Using the correct size of roofing nail will ensure that your roof stays intact for many years to come and can help you avoid the common problem of roofing nails that extract themselves over time and cause you to lose shingles. An underlayment of felt roofing is optional. You will need 1 10 gallon of lap not mastic cement for every roll and 2 pounds of roofing nails for every square.
For a slightly sloped roof use the concealed nail method shown.

7 Steps To Temporarily Patch Your Roof With A Tarp Roof Emergency Roof Repair Roof Patch Roof Repair

11 Outstanding Terrace Roofing Lanterns Ideas Shed Roof Felt Shed Roof Repair Shed Design

Roofing System Identify Major Deficiencies In The Condition Of The Roofing System What We Observe Roof Coverings Roof D Vinyl Gutter Shingling Drip Edge

Cement Roof Shingles Alternative Energy Solar Thermal Roof Design

Pin On Roof

Common Roofing Errors Jlc Online Roofing Roof Underlayment Roofingshingles Roofrepair Roof Installation Roof Shingles Roofing

How To Finish The Top Edge Of A Shed Roof In 2020 Shed Shed Roof Architectural Shingles

Pin On Gutters

Pin On Home Building Repair Or Rebuild

How To Repair Nail Holes In Metal Roof Metal Roof Corrugated Metal Roof Roof Leak Repair

12 Roof Repair Tips Find And Fix A Leaking Roof Roof Repair Leaking Roof Repair

Diy Roof Maintenance Check List And Repair Roofing Shingles With Photos Part 1 Roof Maintenance Shingling Roofing
Asphalt Sbs Roll Roofing Installation Details How To Install Roll Roofing

Metal Roof Seamer Metal Roof Standing Seam Metal Roof Roof Design

10 X 100 Epdm Rubber Roofing Roll 45 Mil Rubber Roofing Epdm Roofing Roofing Materials

Roofing Contractors In Southern Maryland Di 2020

Wacky Laki Nesting Dolls Cute Nail Art Manicure Hair And Nails

Pin On Construction Working With Cement Concrete
Https Encrypted Tbn0 Gstatic Com Images Q Tbn 3aand9gcqhb7ffttswzcd5bnmttwzlb2ltnhgsraaqv1abzyggrzzoka9a Usqp Cau

Once You Develop The Dishes Package Them As Needed In Pump Or Squeeze Bottles Sprays And Roll Essential Oils Essential Oils Cleaning Living Essentials Oils

Installing Asphalt Roof Shingles On A Small House Roof Repair Diy Diy Roofing Asphalt Roof Shingles

Cricket And Stepflashing Masonry Chimney On Shingle Roof Roofingideas Home Construction Roofing Building A House

The Dos And Don Ts Of Architectural Shingle Installation Architectural Shingles Installing Shingles Shingling

Winged Gable Roof Design Gable Roof Design Roof Design Gable Roof

Excited To Share This Item From My Etsy Shop Fingerless Gloves Arm Warmers Felted Cuffs Larp Boho Wrist Warmers Wo Arm Warmers Wrist Warmers Felt Leaves

Pin On Roof Repair Ideas

Pin On Home

Taunton Ma Roofing Replacement Roofing Taunton Vans

Watch This Before Sheeting Your Roof With Osb Avoid This Costly Nail Roof Edge Roofing Roof

Palisade Synthetic Underlayment 10 Sq Underlayment Palisades Synthetic

Extremely Happy With My Hm 126 And I Am Putting It To Good Use Improving My Sawmill Setup Don Hm126 Portable Saw Mill Sawmill Forestry Equipment

Polypropylene Batten Tape 2 3 4 Greenhouse Film Batten 100 Yards

California Cut Valley Installation Trick Roofer Training Youtube

Our Blown In Attic Insulation Comes From The Best Owens Corning Commercial Roofing Home Remodeling Roofing Logo

Pin By Nikki Mayo On Everything About Roofing Ridge Vent Roof Home Repair

Berridge Manufacturing Manufacturing Roof Panels Paneling

Vases Of Self Hardening Clay Clay Vase Clay Pottery Clay

How To Install Roll Roofing Lovetoknow

Pin On Easy Beginner Woodworking Projects And Tips

Prime Metal Roofing Metal Roof Corrugated Metal Roof Roofing

How To Install Rolled Roofing On My Garden Shed Build Youtube

Home Image By Hailey Baer Home Decor Decor Happy Places

